

Every summer PSA welcomes the return of a group of our alumni – children who attended PSA and have gone on to the big brave world of kindergarten, first, and second grade. Our alumni participants really enjoy returning to the familiar, nurturing environment of Preschool of the Arts. At the same time, these “big kids” also need new challenges and adventures during the warm summer months. To meet these needs, this summer we have introduced some makerspace elements into the school-age program, as well as some of our older classrooms. A “makerspace” is a learning workshop equipped with a variety of open-ended materials and tools for making things. In a makerspace, students apply design, engineering, and problem-solving skills. Each unique project reflects the interests and ideas of each maker.


- Makerspace is a mindset, not a physical space.
- Making can be for playful or useful ends.
- A made object can be used, interacted with or demonstrated.
- Making is a way to explore ideas, learn new technical skills, and create new products.
One of the main things to keep in mind – failure is part of learning.
In the Blue Room, the teachers presented the children with a number of makerspace books. We paged through a few of the books and made predictions about the book and how to use the books.
Student: It’s a making stuff book.
Student: You can make with it. (the book)
Student: They are instructions.
Then, the making process was broken down into five steps:
- Imagine– Children (in a large or small group) talk together about an idea.
- Plan– Children use forms to draw a plan and write down the materials they need.
- Create– Using open ended materials, the children make their plans come to life.
- Improve– After the object is made, children have a conversation about what is working, what needs to be changed or improved, and further work on a creation.
- Share– Children might present their creation at a large group time, show it to others in a small group, or share their planning sheet with others.
Children have been using the planning sheets to work on their own ideas. They have been drawing their plans carefully and checking in with each other and the original plan while working.

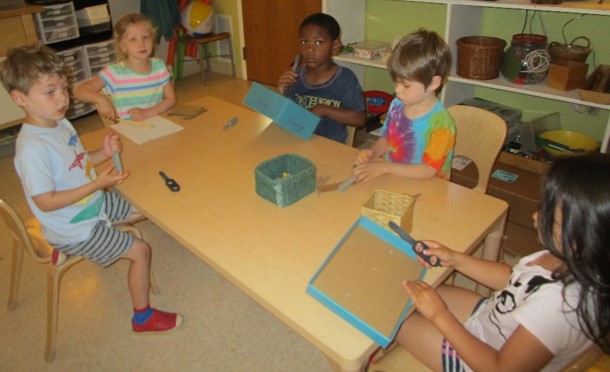


In the Copper Room, our alumni program for the summer, the children started by taking apart a number of old electronics. Children are naturally curious, and allowing them to take things apart feeds and develops their curiosity. Exposing children to real tools and real materials for a real purpose helps foster creativity, self-worth, problem solving, and risk assessment.


The kids took apart old appliances such as toasters, coffee makers, fans, and cake pop makers. They soon had a mountain of dismantled appliances just begging to be made into something else. While taking apart items, there was a commontheme in conversation, “I want to use this to build a robot” So, they did just that!


PICKING A BODY
The kids were first asked to brainstorm ideas of what type of robot they would want to build. Then they were asked to go pick out a base to use for their robot’s body.
CREATING A BLUEPRINT
The next step in robot building was to draw or write out a plan of how they wanted their robot to look. This is a familiar step in the Copper Room, and it helps the kids them focus their ideas and create a rough draft of what they’re creating in theory before they execute the creation.

ADDING THE BODY PARTS
Once everyone at their table was finished with their drawing they spent some time as a group, looking over each other’s drawings. Each table was then given a box of smaller items so they could add details to their robot. The whole table was asked to work together and share the materials.


ASSEMBLING THE ROBOTS
Once they had their body parts, they worked with a teacher to safely start assembling their robots with a hot glue gun.


Our summer makerspaces are just beginning, we can’t wait to see where the children will lead us for the rest of the summer!
Reflections by the Blue Room Teachers and the Copper Room Teachers